下面我将为您提供一份详细的、从零开始的教程,包括前端代码、后端修改和注意事项,这套方案是目前最流行和兼容性最好的实现方式。
核心思路
- 触发按钮:在网站页面的某个位置(如右上角)放置一个“登录/注册”按钮。
- 弹窗层:点击按钮后,通过 JavaScript 显示一个覆盖全屏的半透明遮罩层,并在页面中央弹出一个包含登录和注册表单的窗口。
- 表单提交:用户填写信息后,点击提交,JavaScript 会通过 AJAX 技术将数据异步发送到服务器。
- 后端处理:织梦CMS的后端 PHP 脚本接收数据,验证用户名、密码等信息,并将结果(成功或失败信息)以 JSON 格式返回。
- 前端反馈:前端 JavaScript 接收后端返回的 JSON 数据,根据结果在弹窗内显示提示信息(如“登录成功”或“用户名已存在”),而不是刷新整个页面。
第一步:准备前端文件
我们需要创建三个文件:HTML 结构、CSS 样式和 JavaScript 逻辑。
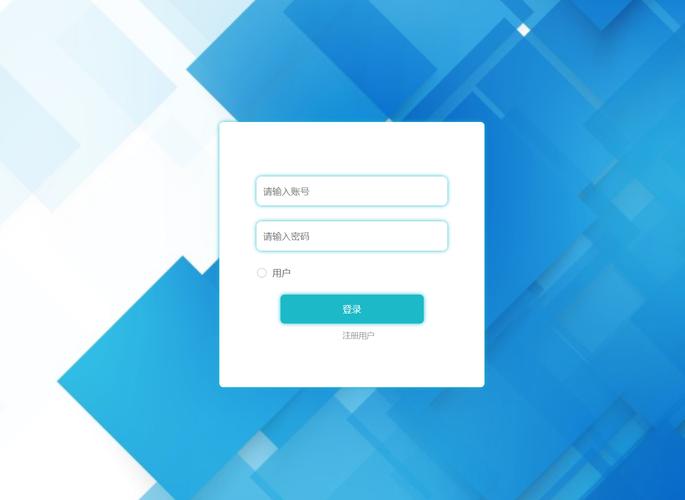
创建 HTML 文件 (login_popup.html)
这个文件包含了弹窗的完整结构,你可以把它放在你的模板目录下,/templets/default/。
<!DOCTYPE html>
<html>
<head>
<meta charset="UTF-8">登录注册弹窗</title>
<!-- 引入 CSS 文件 -->
<link rel="stylesheet" href="login_popup.css">
</head>
<body>
<!-- 页面内容 -->
<h1>织梦CMS网站</h1>
<p>点击右上角的按钮体验弹窗登录/注册。</p>
<!-- 触发按钮 -->
<button id="loginBtn">登录 / 注册</button>
<!-- 弹窗遮罩层 -->
<div id="popupOverlay">
<!-- 弹窗内容 -->
<div class="popupBox">
<!-- 关闭按钮 -->
<span class="closeBtn">×</span>
<!-- 标签页切换:登录 和 注册 -->
<div class="tabs">
<button class="tab-btn active" data-tab="login">登录</button>
<button class="tab-btn" data-tab="register">注册</button>
</div>
<!-- 登录表单 -->
<div id="loginForm" class="tab-content active">
<form id="ajaxLoginForm">
<input type="text" name="userid" placeholder="用户名/邮箱/手机" required>
<input type="password" name="pwd" placeholder="密码" required>
<button type="submit" class="submit-btn">登 录</button>
</form>
<div class="form-tip"></div>
</div>
<!-- 注册表单 -->
<div id="registerForm" class="tab-content">
<form id="ajaxRegisterForm">
<input type="text" name="userid" placeholder="用户名" required>
<input type="email" name="email" placeholder="电子邮箱" required>
<input type="text" name="uname" placeholder="昵称" required>
<input type="password" name="pwd" placeholder="密码" required>
<input type="password" name="pwdconfirm" placeholder="确认密码" required>
<button type="submit" class="submit-btn">注 册</button>
</form>
<div class="form-tip"></div>
</div>
</div>
</div>
<!-- 引入 JavaScript 文件 -->
<script src="login_popup.js"></script>
</body>
</html>
创建 CSS 文件 (login_popup.css)
这个文件负责弹窗的所有样式。
/* 弹窗相关样式 */
#popupOverlay {
    display: none; /* 默认隐藏 */
    position: fixed;
    top: 0;
    left: 0;
    width: 100%;
    height: 100%;
    background-color: rgba(0, 0, 0, 0.5); /* 半透明黑色背景 */
    z-index: 9999;
    justify-content: center;
    align-items: center;
}
.popupBox {
    background: #fff;
    padding: 20px 30px;
    border-radius: 8px;
    width: 90%;
    max-width: 400px;
    position: relative;
    box-shadow: 0 0 15px rgba(0,0,0,0.3);
}
.closeBtn {
    position: absolute;
    top: 10px;
    right: 15px;
    font-size: 24px;
    cursor: pointer;
    color: #999;
}
.closeBtn:hover {
    color: #333;
}
/* 标签页样式 */
.tabs {
    display: flex;
    border-bottom: 1px solid #eee;
    margin-bottom: 20px;
}
.tab-btn {
    flex: 1;
    padding: 10px;
    border: none;
    background: none;
    cursor: pointer;
    font-size: 16px;
    border-bottom: 2px solid transparent;
}
.tab-btn.active {
    border-bottom-color: #007bff;
    color: #007bff;
}
/* 表单样式 */
.tab-content {
    display: none; /* 默认隐藏 */
}
.tab-content.active {
    display: block;
}
.tab-content input {
    width: 100%;
    padding: 10px;
    margin-bottom: 15px;
    border: 1px solid #ddd;
    border-radius: 4px;
    box-sizing: border-box; /* 确保padding不会影响宽度 */
}
.submit-btn {
    width: 100%;
    padding: 12px;
    border: none;
    border-radius: 4px;
    background-color: #007bff;
    color: white;
    font-size: 16px;
    cursor: pointer;
}
.submit-btn:hover {
    background-color: #0056b3;
}
.form-tip {
    margin-top: 10px;
    text-align: center;
    color: #dc3545; /* 错误信息用红色 */
    height: 20px; /* 固定高度,防止跳动 */
}
创建 JavaScript 文件 (login_popup.js)
这是实现弹窗交互和 AJAX 提交的核心。

document.addEventListener('DOMContentLoaded', function() {
    // 获取DOM元素
    const loginBtn = document.getElementById('loginBtn');
    const popupOverlay = document.getElementById('popupOverlay');
    const closeBtn = document.querySelector('.closeBtn');
    const tabBtns = document.querySelectorAll('.tab-btn');
    const tabContents = document.querySelectorAll('.tab-content');
    const ajaxLoginForm = document.getElementById('ajaxLoginForm');
    const ajaxRegisterForm = document.getElementById('ajaxRegisterForm');
    // 1. 显示弹窗
    loginBtn.addEventListener('click', function() {
        popupOverlay.style.display = 'flex';
    });
    // 2. 关闭弹窗
    function closePopup() {
        popupOverlay.style.display = 'none';
        // 清空表单和提示信息
        ajaxLoginForm.reset();
        ajaxRegisterForm.reset();
        document.querySelectorAll('.form-tip').forEach(tip => tip.textContent = '');
    }
    closeBtn.addEventListener('click', closePopup);
    // 点击遮罩层也可以关闭弹窗
    popupOverlay.addEventListener('click', function(e) {
        if (e.target === popupOverlay) {
            closePopup();
        }
    });
    // 3. 标签页切换
    tabBtns.forEach(btn => {
        btn.addEventListener('click', function() {
            const targetTab = this.getAttribute('data-tab');
            // 移除所有active类
            tabBtns.forEach(b => b.classList.remove('active'));
            tabContents.forEach(c => c.classList.remove('active'));
            // 为当前点击的标签和对应内容添加active类
            this.classList.add('active');
            document.getElementById(targetTab + 'Form').classList.add('active');
        });
    });
    // 4. AJAX 登录
    ajaxLoginForm.addEventListener('submit', function(e) {
        e.preventDefault(); // 阻止表单默认提交
        const formData = new FormData(this);
        const tipElement = this.nextElementSibling; // 获取提示信息的div
        // 使用 fetch API 发送 AJAX 请求
        fetch('/member/ajax_login.php', {
            method: 'POST',
            body: formData
        })
        .then(response => response.json())
        .then(data => {
            if (data.status == 1) {
                tipElement.textContent = data.msg;
                tipElement.style.color = 'green';
                // 登录成功,可以刷新页面或跳转
                setTimeout(() => {
                    closePopup();
                    window.location.reload(); // 简单处理:刷新页面显示登录状态
                }, 1500);
            } else {
                tipElement.textContent = data.msg;
                tipElement.style.color = 'red';
            }
        })
        .catch(error => {
            console.error('Error:', error);
            tipElement.textContent = '网络错误,请稍后重试';
            tipElement.style.color = 'red';
        });
    });
    // 5. AJAX 注册
    ajaxRegisterForm.addEventListener('submit', function(e) {
        e.preventDefault();
        const formData = new FormData(this);
        const tipElement = this.nextElementSibling;
        // 密码一致性检查
        const pwd = formData.get('pwd');
        const pwdconfirm = formData.get('pwdconfirm');
        if (pwd !== pwdconfirm) {
            tipElement.textContent = '两次输入的密码不一致';
            tipElement.style.color = 'red';
            return;
        }
        fetch('/member/ajax_login.php', {
            method: 'POST',
            body: formData
        })
        .then(response => response.json())
        .then(data => {
            if (data.status == 1) {
                tipElement.textContent = data.msg;
                tipElement.style.color = 'green';
                // 注册成功,切换到登录标签页
                setTimeout(() => {
                    document.querySelector('[data-tab="login"]').click();
                }, 1500);
            } else {
                tipElement.textContent = data.msg;
                tipElement.style.color = 'red';
            }
        })
        .catch(error => {
            console.error('Error:', error);
            tipElement.textContent = '网络错误,请稍后重试';
            tipElement.style.color = 'red';
        });
    });
});
第二步:修改织梦CMS后端文件
织梦自带的 /member/ajax_login.php 文件已经为我们处理了大部分逻辑,但我们需要确保它能正确处理注册请求,并返回标准 JSON 格式。
- 找到文件:打开
/member/ajax_login.php。 - 修改代码:找到处理注册请求的部分(通常在
if($dopost == 'regnew')附近),确保它在成功或失败时都使用ShowMsg()函数,并且这个函数能输出 JSON。
织梦默认的 ShowMsg() 函数在 AJAX 模式下已经可以输出 JSON,所以我们只需要确保调用方式正确,通常默认代码是没问题的。
检查一下你的 /member/ajax_login.php 文件,在文件开头应该有类似这样的代码来设置响应头:
// 在 ajax_login.php 的最开始
if(empty($dopost)) {
    exit();
}
header('Content-Type: application/json; charset=utf-8');
这个很重要,告诉浏览器我们返回的是 JSON 数据。

如果你需要自定义返回信息,可以在 ShowMsg 函数调用时调整参数,在注册成功的地方,确保代码类似这样:
// 在注册成功的逻辑块里
$msg = '注册成功,请登录!';
$gourl = '-';
ShowMsg($msg, $gourl, 0, 5000);
织梦的 ShowMsg 在 AJAX 模式下会自动将其包装成 {"status":1, "msg":"..."} 这样的 JSON 对象。
第三步:整合到你的织梦模板
你需要将上面的功能整合到你网站的模板中。
-
上传文件:
- 将
login_popup.css上传到你的模板目录,/templets/default/style/。 - 将
login_popup.js上传到你的模板目录,/templets/default/js/。 - (可选)
login_popup.html可以作为参考,你不需要直接上传它。
- 将
-
修改模板文件:
- 打开你的主模板文件,通常是
/templets/default/index.htm。 - 在
<head>标签内引入 CSS 文件:<link rel="stylesheet" href="{dede:global.cfg_templets_skin/}/style/login_popup.css"> - 在
<body>标签内的合适位置(比如头部)添加触发按钮:<button id="loginBtn">登录 / 注册</button>
- 在
<body>标签内的最底部,在</body>之前引入 JavaScript 文件:<script src="{dede:global.cfg_templets_skin/}/js/login_popup.js"></script> - 重要:将弹窗的 HTML 结构 (
<div id="popupOverlay">...</div>) 也添加到你的模板文件中,通常放在<body>标签内的最底部,但要在引入 JS 文件之前。
整合后的
index.htm示例结构:<!DOCTYPE html> <html> <head> <meta charset="UTF-8"> <title>{dede:global.cfg_webname/}</title> <link rel="stylesheet" href="{dede:global.cfg_templets_skin/}/style/login_popup.css"> <!-- 其他样式表 --> </head> <body> <!-- 你的网站头部 --> <header> <div class="header-right"> <button id="loginBtn">登录 / 注册</button> </div> </header> <!-- 你的网站内容 --> <main> <!-- ... --> </main> <!-- 弹窗的HTML结构 --> <div id="popupOverlay"> <!-- ... 从 login_popup.html 复制这里的所有内容 ... --> </div> <!-- 引入JS --> <script src="{dede:global.cfg_templets_skin/}/js/login_popup.js"></script> <!-- 其他JS文件 --> </body> </html> - 打开你的主模板文件,通常是
第四步:可选优化(推荐)
为了更好的用户体验,你可以:
-
已登录用户不显示按钮: 在
index.htm中,通过 PHP 判断用户是否已登录,如果已登录,就不显示“登录/注册”按钮,而是显示“会员中心”或“用户名”。{dede:if get='islogin' == 0} <button id="loginBtn">登录 / 注册</button> {else} <a href="/member/">会员中心</a> {/dede:if} -
美化样式: 根据你网站的整体风格,修改
login_popup.css中的颜色、字体、间距等,使其与网站设计融为一体。 -
增加验证码: 在登录和注册表单中增加织梦的验证码功能,以防止恶意注册,这需要修改 JS 和 PHP,稍微复杂一些,但安全性更高。
通过以上四个步骤,你就可以成功地在你的织梦CMS网站上实现一个功能完善、体验流畅的弹出式登录注册功能,这套方案的核心是 AJAX + 织梦自带的后端接口,是目前最标准和推荐的做法。


